• Skip to primary navigation
  • Skip to main content
  • Skip to primary sidebar

Soccer Training Solutions

Individual Soccer Training Tips, Soccer Drills, Fitness Tips and More

  • Home
  • About Us
  • Contact
  • Individual Training
  • Our Complete Training System
  • Fitness & Strength
  • Game Tips
  • Nutrition

Individual Soccer Training

How to Get Better At Passing in Soccer

By Parker & Walsh Leave a Comment

soccer passing

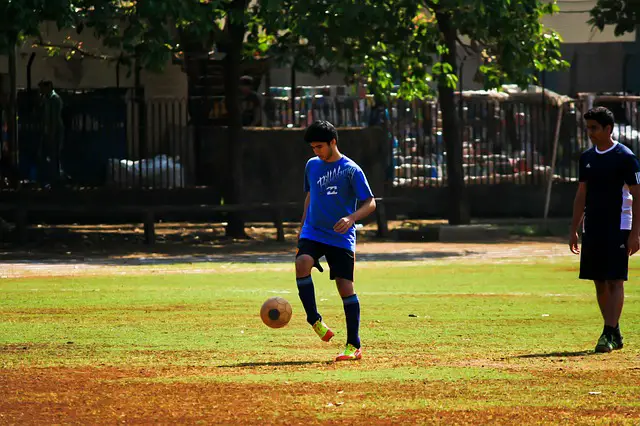
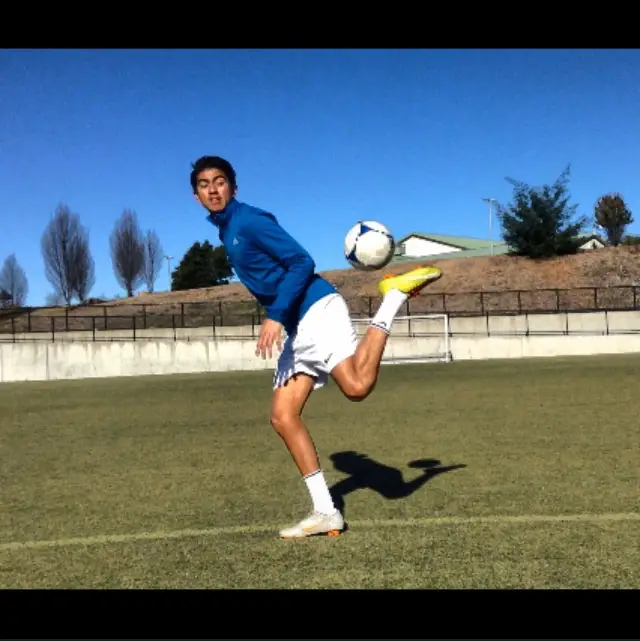
When you’re dedicating yourself to soccer training in order to get better on the field, the most “fun” skills to practice might be shooting and dribbling.

After all, who doesn’t want to weave through hapless defenders and fire shots into the goal?

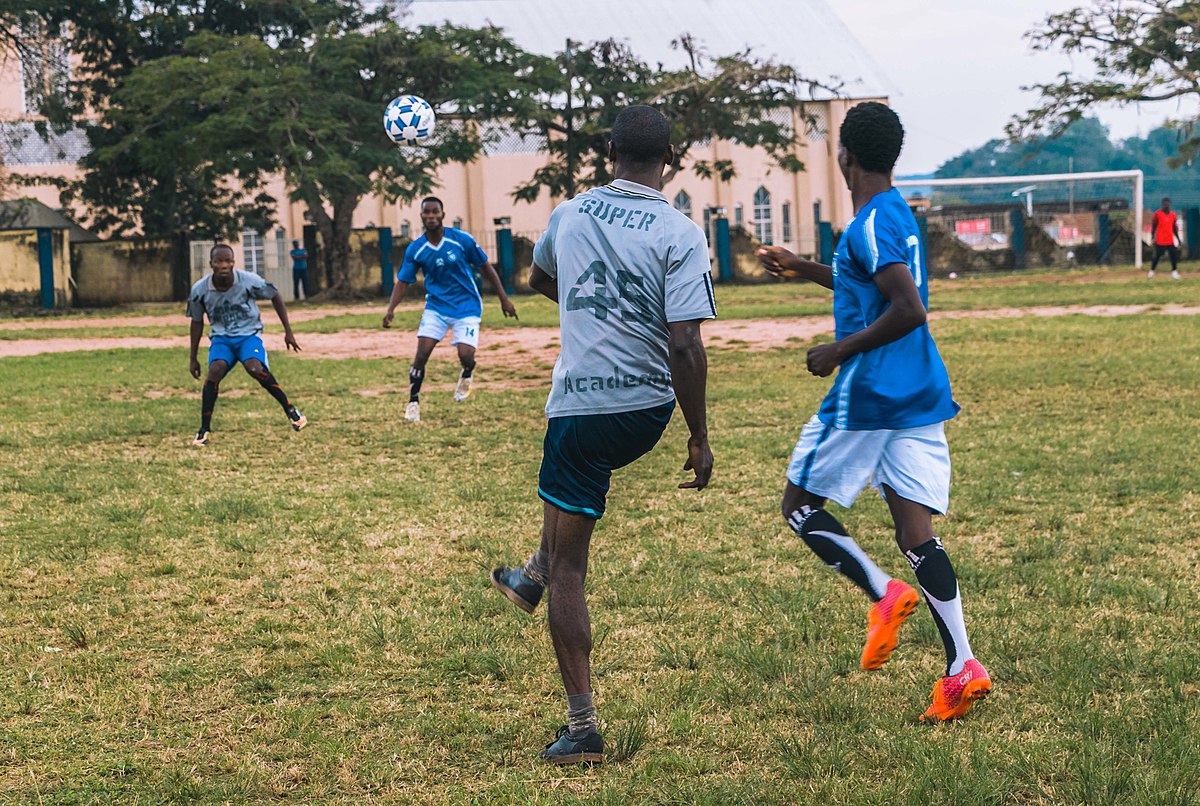
But if you want to make the most significant improvements to your game, then passing is a crucial skill to work on.

Why is this?

For several reasons, really. First, passing is the fastest way to move the ball from one point on the field to another, much quicker than dribbling, in fact.

Passing also helps your team keep the ball, and the ability to possess is an essential skills of just about every successful team.

But this goes far beyond just passing around for passing’s sake.

Instead, possession helps break down defenses and generate scoring chances; it helps you involve more players on your team when they are in advantageous positions; and it can even be a defensive act in order to relieve pressure from the other team or recycle possession into a new area.

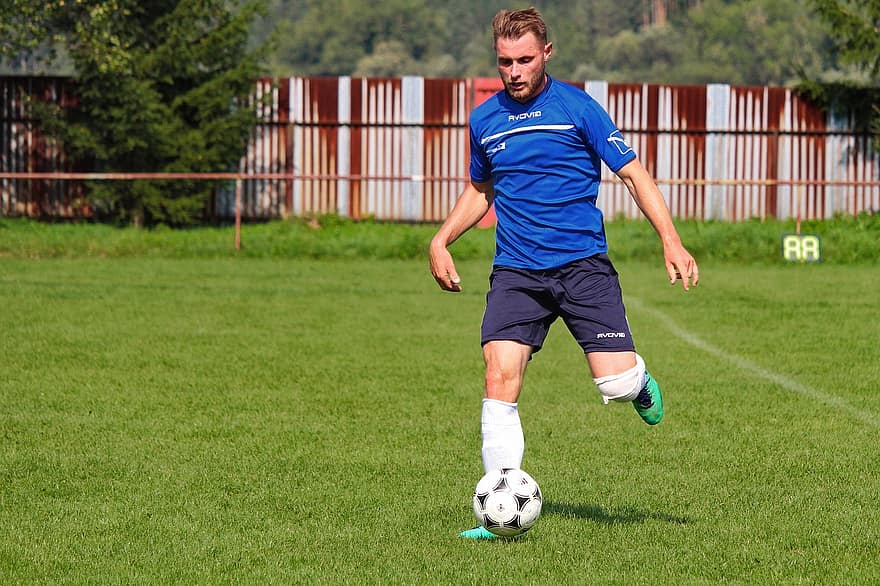
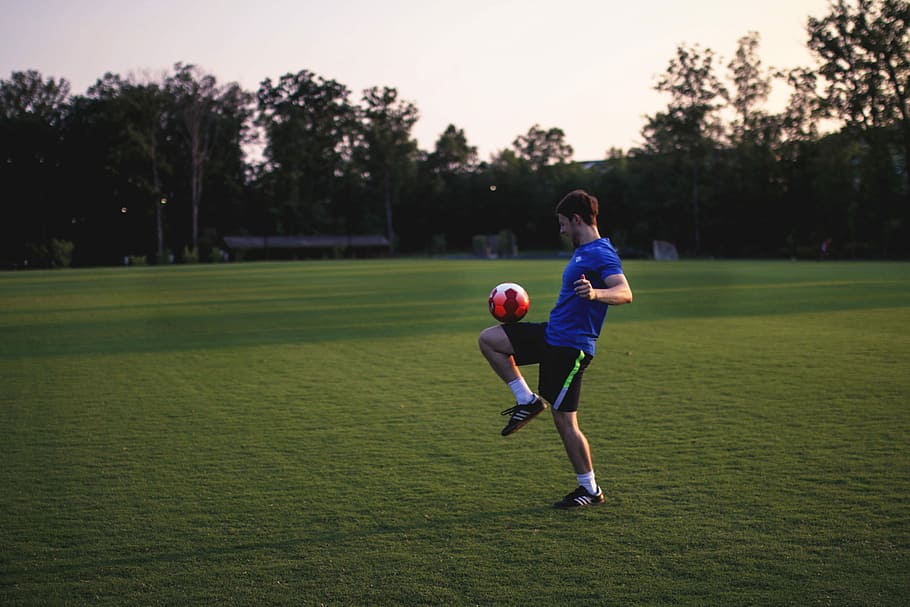
On an individual level, passing is such a fundamental soccer skill because it has so much variation.

Passing utilizes all surfaces of both feet. The ball can travel only a few feet or all the way across the field or vertically up to an attacker from defense or midfield.

It can be on the ground, in the air, a lob, a chip, a driven ball, even a backheel.

So if you work towards getting better at passing, this variety will help turn you into a much more well-rounded player who can be confident of playing exactly the right type of ball at the right time.

The rest of this article will go over how you can improve your passing, including some drills and exercises you can work on to hone this skill.

The Essentials of a Good Pass: Pace (Weight) and Direction

In order to be a good passer of the ball, you need to make sure you utilize correct pace and direction.

The pace or weight of your pass is referring to the power it is passed with, so that it does not die before reaching its destination but is also not too difficult for its recipient to control.

The direction of your pass is more than just whether it is forward, backward, or lateral. It’s also about where your teammate will be receiving it. Proper direction is usually into space, and allows them to receive it across their body.

You’ve probably heard of a “hospital ball” which means it is does not have the right pace and direction and instead puts the recipient directly into trouble, often colliding with an opponent.

Proper passes, on the other hand, get your teammate into good positions.

How to Improve Your Passing Skills

There are lots of ways you can get better at passing, so no matter what situation you find yourself in, you can work on it.

It’s great if you have a partner to practice with, as there are nearly endless variations of partner passing you can work on.

Partner Passing Exercises

One of the most important principles is to pass the ball while it’s moving as much as you can. This helps simulate a game-like situation. It’s also crucial to work on passing with your non-dominant or weak foot so that you can confidently pass when it is your best option during a game.

We recommend starting close together with two-touch passing on the ground, using both feet to receive the ball and pass.

With your partner, by passing with the inside of your foot, but then work in the outside of your foot, both to control the ball and then to pass.

After working on this for a while, switch to one touch passing (again with both feet).

Be sure to keep your feet moving (by basically running in place) after the pass while you are waiting to get it back.

Also pay close attention to your form; for example making sure your plan foot is close enough to the ball and pointed to your target, and following through with your passing leg.

Then mix things up by backing up so you are playing longer passes to your partner. (You can choose the exact distances) Once you are at least 20 feet apart or more, start passing the ball in the air. Try driving the ball with pace, and chipping it too. Aim so that the ball ideally drops right on your partner’s foot, not too high or too low.

Another variation is to pass and move, by having both partners jog around a designated area while they pass.

Another great drill is partner passing drill Brazilians, which gets you quite a bit of movement as well. To do it, face your partner and make sure there is a large space behind one of you.

Choose one player to run forward and the other to backpeddle, so you keep the same rough distance from each other as you move across the field or open area.

The player running forward passes the ball on the ground, and the other cushions it and stops it while running backwards. When you get to the edge of the area you’re playing in, switch roles and repeat the exercise going back to where you started. As with all other passing drills, make sure to use both feet.

Individual Passing Drills You Can Do Without a Partner

If you don’t have anyone to practice with, try passing against a wall if you have one available. You can do most of the partner passing drills (varying the surface of your foot, one and two touch, on the ground and in the air and the distance of the pass).

The only thing you can’t do, obviously, is get the wall to move around with you. And you’re limited to how much you can vary your receiving since you’re limited to how your pass comes off the wall, but get creative.

Since you don’t have a teammate to aim for, try to designate an exact spot on the wall to aim for that can stand in for your teammate’s foot. Be extremely strict about your accuracy as you go through the drills.

And what if you don’t have a wall or similar surface? There are still plenty of ways to practice passing!

One that we like involves taking a cone, second soccer ball, shoe, or other item about 10 yards away from you. This object will be about the width of a player’s foot so it will stand in as your teammate.

Here you can pass the ball (ideally moving) along the ground and try to hit your target. You can even make this a game: start hitting your target from 10 yards away, and then move back 5 yards until you get to 30-40 away. Also work on passing the ball in the air to hit your target.

We hope this article has helped you understand the importance of becoming a better passer, and given you plenty of practical ways to practice this crucial skill no matter your training environment. If you have any questions or comments about passing, let us know in the comments below.

image credit

Filed Under: Individual Soccer Training Tagged With: Passing

Weak Foot Soccer Drills: How to Improve Your Non-Dominant Foot

By Parker & Walsh Leave a Comment

soccer weak foot

In soccer, most of us prefer to use one foot to the other. When training, in both team and individual settings, we are easily tempted to give our strong foot the most attention with our drills and exercises.

(Just to be clear: strong and dominant mean the same thing as do weak and non-dominant; it’s not that one foot is physically weaker than the other, but rather that you are less skilled with using that foot.)

And in game situations, we also significantly favor that foot because it gives us more confidence that we’ll be able to dribble, pass, and shoot successfully.

Why You Need to Improve Your Weak Foot

But as you progress to higher levels, you can’t always just use your strong foot. When you find yourselves in tight spaces, being able to confidently use both feet will allow you to play quicker and keep the ball more.

When you’re in space, being able to use both feet makes you more unpredictable to defend. On the wing, you need to be able to pass or cross while facing forward or after you cut inside, which requires the use of both feet.

And as you approach the opponent’s goal, it’s vital to be able to shoot with both feet so you can fire on goal without having to take extra touches to get the ball on your strong foot. If you do so, the chance will likely disappear before you can get a shot off.

And there are even more benefits of learning to use both feet, including better balance and stability as you move around the field.

So hopefully these points have convinced you of the need to improve your weak foot, so what specifically can you do to work on it?

Drills to Work on Your Non-Dominant Foot

Since the previous section referred to practically all of the fundamental soccer skills, you want to make sure that your weak foot practice is focused on multiple areas of the game. Specifically, you want to practice dribbling, receiving, and passing in a variety of ways.

But one of the first drills to work on is more simple: juggling!

This is a great way to get lots of touches with your weak foot in a short period of time, and improve your touch, balance and coordination all at once.

If you’re just getting started developing your non-dominant foot, start small. You can begin with the ball in your hands, drop it, juggle once, and catch it again.

Once you become comfortable with your touch, you can increase it to two juggles, and then continue with more.

Before you know it, you’ll be much more confident with your touches. Set a high number of juggles (like 100) without letting the ball drop and keep practicing until you reach it.

For working on passing with your weak foot, you want to be sure you are using all surfaces: like the inside, outside, and laces.

To practice, all you need is a wall to pass off of, or a soccer rebounder, or if you need to practice at home for whatever reason you can even use the back of a couch or chair (but make sure it’s not something you will damage!)

Of course, a partner to pass with is ideal too if you can. But there’s no excuse not to practice if you’re by yourself.

Also work on playing both two-touch and once-touch with your weak foot. The two-touch will help you hone your receiving/trapping skill as well as getting your footwork more coordinated as you line up for the pass.

One-touch passing with your non-dominant foot is great for improving your technique and weight and accuracy of your passes.

Another way to get more work on your receiving is to throw the ball up in the air and practice controlling it with your non-dominant foot. Work on both the inside and outside of the foot.

As you start to gain confidence and skill on your non-dominant foot (possibly causing you to stop using the “weak” designation in your mind), you also should work on longer passes.

Ideally with a partner, work on chipping, driving, and crossing the ball at a variety of distances.

If you are training individually, you can set up a laundry basket or similar item and work on chipping/driving the ball into it. (This can be a fun way to set up challenges for yourself as well.)

For dribbling, you can easily set up a course for yourself with any everyday objects from cones to stray shoes. Set up a line of 5 to 10 spaced a few yards apart and work on dribbling though them with your non-dominant foot.

Be sure to start slow and focus on your technique and then gradually increase your speed. You can also move the items closer together to make it tougher.

All of these drills and exercises are designed to get you lots of touches and help you gain confidence.

After some practice, you’ll feel much more comfortable going to either foot in practice and game situations, which will truly open up the possibilities for your game and take you to higher levels.

photo credit

Filed Under: Individual Soccer Training

Soccer Moves and Exercises You Can Practice Inside at Home

By Parker & Walsh Leave a Comment

home

As the weather starts to get colder and you find yourself caught inside, you can still perform soccer exercises and moves at home to improve your skills.

You can do ball exercises in a space like your living room or basement, and you don’t need much space at all in order to work on these.

Soccer ball exercises will not only improve your touch but also help keep your fitness up during the next few colder months before you can get back outside again. (And of course, these soccer ball exercises can also be performed outside.)

In previous articles, we outlined how to get 2,000 touches by juggling and 1,500 with dribbling exercises.

Elite players will work towards getting 10,000 touches per day and beginners should work towards getting 1,000 to 3,000 touches per day.

The number of total touches are given for the beginner performance level for the juggling and the dribbling exercise.

However, you can just perform the beginner number touches for each exercise multiple times to reach the proficient level and elite level.

Soccer ball exercises are a great way to get in your daily touch totals. Below is an At Home Indoor Soccer Ball Exercise workout with 10 soccer skill exercises.

Again it is set at the Beginner performance level but you can do this routine 7 times to get to the Elite level.

How Many Touches to Get Each Day: Performance Levels

Beginner:  1,000 – 3,000 touches per day

Proficient:  5,000 touches per day

Elite:  10,000 touches per day

Indoor Practice Plan: Top Exercises and Moves (1500 total touches)

Stationary Toe Touches/Ball Taps

Alternate using the ball of your foot to lightly touch the top of the soccer ball. This is similar to stationary stair steppers. 75 touches each foot = 150 touches

Stationary Pendulums/Tic-Tocs

Cut the soccer ball with the inside of your foot moving the ball back and forth between your feet. 100 touches each foot = 200 touches

Single Foot Sole Roll Forward then Backwards

Forward and backwards is one rep getting you 2 touches per rep. 

  • Right foot 2 touches x 25 reps = 50 touches
  • Left foot 2 touches x 25 reps =50 touches

Start with the ball away from your body so you can just reach it with your toes at a 45 degree angle. Use the sole of your foot to pull the ball back towards your body and then push the ball away with the outside of your foot at a 45 degree angle to simulate at preparation touch. Pull backwards and push forward is one rep getting you 2 touches per rep.

  • Right foot 2 touches x 50 reps = 100 touches
  • Left foot 2 touches x 50 reps = 100 touches

Single Foot Pull Push Instep (Laces)

Start with the ball away from your body so you can just reach it with your toes.

Use the sole of your foot to pull the ball back towards your body and then push the ball forward with your laces. Pull backwards and push forwards is one rep getting you 2 touches per rep.

  • Right foot 2 touches x 50 reps = 100 touches
  • Left foot 2 touches x 50 reps = 100 touches

Sole Drag/Pull Back, Inside Push

Start with the ball away from your body so you can just reach it with your toes.

Use the sole of your foot to pull the ball back towards your body and then push the ball forward with the inside of your other foot like you are passing the ball.

Pull backwards and inside push forward is one rep getting you 2 touches per rep.

  • Right foot pull back, Left foot inside push x 50 reps = 100 touches
  • Left foot pull back. Right foot inside push x 50 reps = 100 touches

Sole Roll, Stop side to side

Start with the ball outside your body at a 45 degree angle. Use the sole of your foot to roll the ball perpendicular across your body while stepping in the same direction.

Then use the inside of your other foot to stop the ball.

Next, use the same foot that you just stopped the ball with to now use the sole of your foot to roll the ball perpendicular across your body while stepping in the same direction.

Then use the inside of your other foot to stop the ball. Side to side is one rep which gets you four touches per rep. 25 reps = 100 touches

Inside of Foot Cut, Stop side to side

Start by cutting the ball with the inside of your foot perpendicular across your body and then stop in with the inside of your other foot.

Then cut the ball back with the same foot you just stopped the ball with and cut the ball perpendicular across your body and stop it with the inside of your other foot.

Side to side is one rep which gets you four touches per rep.  25 reps = 100 touches

The L Move, Sole Pull Across

Start with the ball in front of one foot. Pull the ball with the sole of your foot behind your standing foot. Then tap the ball with the inside of your foot behind your standing foot. Next use the sole of your foot to pull the ball back across to your starting foot. 1 time around will get 3 touches. 

  • Right foot L Move x 25 reps = 75 touches
  • Left foot L Move x 25 reps = 75 touches

Brazilian Sole Rolls – Use the sole of your foot to flick the ball perpendicular across your body. 50 touches each foot = 100 touches

For more ideas, read our article on ball control drills you can do inside in a small space.

Filed Under: Individual Soccer Training

Soccer Fundamentals Explained: The Best Skills to Have and How to Improve Them

By Parker & Walsh Leave a Comment

soccer fundamental skills

There are a variety of skills that everyone needs to master in order to be successful playing soccer. You likely have heard coaches or other people in the game calling these skills the “soccer fundamentals” which are particularly important.

Some of these skills are fairly obvious. For example, even if you’re a beginner I’m sure you know the importance of knowing how to pass the ball.

But what exactly makes something a fundamental skill, and more importantly, what can you do as a player to learn these fundamentals most effectively?

For Beginners: What Are these Fundamentals Anyway?

There’s no soccer coaching body that publishes an agreed-upon list of a set number of “fundamentals.” If you search online or read a stack of soccer coaching books, you’ll find a widely varying number of them, as well as some discrepancies as to what gets counted as a fundamental.

But there are commonalities that you’ll see almost everywhere. These are the key skills that all players need to master no matter the level they are at or the positions which they are playing.

We briefly describe each soccer fundamental here, with some links into other articles that go into more detail on each skill. I will say that fundamentals are much different for goalkeepers; this article is talking about field players.

Fundamental #1: Passing

What’s the quickest way to get the ball from Point A to Point B on the field? Some may think it’s by dribbling, but passing the ball is the fastest and most efficient way to move it across the field.

This helps get more teammates involved at key positions on the field, break down the defense, and ultimately get the ball in dangerous attacking positions.

In other situations, passing can actually be more of a defensive move, allowing you to relieve pressure from the opponent and catch your breath while preparing to gear up for your next move up the field.

At a most basic level, any time your team is in possession of the ball and passing it around, the opposing team is chasing and getting tired, which gives you the advantage.

Any great team is able to pass the ball at a high level (even if they ultimately decide to favor other parts of the game in their tactics), and thus any great player needs to be proficient in passing.

This is why we consider passing among the most important of fundamental skills and something that every player, regardless of position, needs to spend a lot of time refining.

Fundamental #2: Receiving/First Touch

This is the other side of passing; the player who receives the pass. You may know this skill as “trapping” but that term has fallen out of favor because it signified stopping the ball dead. Receiving, on the other hand, is getting the ball under your control in a fluid motion so you can make your next move.

We’ve included first touch in here too which is a related but slightly different idea. Your first touch is not just when you receive a pass by a teammate, but any time you gain possession of the ball, be it from a crisp pass or a awkwardly bouncing ball.

Fundamental #3: Dribbling

Although passing is a more efficient team strategy for moving the ball, any good player also needs to be confident in their ability to dribble.

By dribbling you can take players on and get past them. You can dribble to create your own shot. You can even get yourself out of a dangerous situation or tight space by moving into a better position.

In short, it’s about as fundamental a skill as you can get, and one that all players need to work on and master.

Fundamental #4: Shooting

Some may challenge the idea that shooting is something that all players need to learn how to do well, and thus question its fundamental status. After all, isn’t it just forwards who need to know how to shoot?

This is incorrect.

Midfielders regularly get up into the attacking third and need to be ready to shoot when they have the space and opportunity. Most defenders will do the same on occasion, and will also likely find themselves in the opposing team’s box on corners and other set pieces.

With this in mind, it’s still very important that defenders and midfielders learn to shoot with proper form, because they may only get one chance to do it and need to be ready to take advantage.

Fundamental #5: Defending

Similar to shooting, defending is another fundamental skill that some mistakenly think is only for defenders.

But defending happens in all areas of the field and needs to be done by all players. A forward who loses the ball needs to apply the right pressure so the team can win it back. Every player needs to have the skills to put in a strong tackle when defending.

Fundamental #6: Heading

Heading is another key skill that is necessary for all players, no matter their position. It’s a diverse skill: forwards head the ball for a shot on goal; midfielders jockey to win airballs in the center of the pitch; and defenders must head the ball out of their box and into safety.

In addition, learning proper heading form is extra important because repeated improper heading can increase the risk of concussions and even brain damage. As the safety of heading continues to be investigated, there may be changes to it, especially at the youth levels.

Drills for Learning Soccer Fundamentals

There are countless ways to improve these fundamentals. You naturally work on them in game situations, with the benefit that you will experience them in realistic situations and naturally connected to each other.

But games and scrimmages aren’t enough for working on your fundamentals. A full sided game won’t give you enough touches and repetition of any skill to make a major difference all by itself.

Instead, you need to work on these skills in isolation. If you’re on a team with a good coach, he or she should already be designing drills that work on these skills. These might include give and gos with a partner; dribbling at a cone and performing a move; or 1v1 challenges.

But in addition, it’s a great idea to work on these fundamental skills through individual training.

Best Ways to Improve Soccer Fundamentals By Yourself

For passing, you can practice with a partner if you have one, or you can pass against a wall or a soccer rebounder. Make sure you’re using both feet, and passing with all surfaces. Work on passing on the ground as well as driving and chipping balls.

Pass with the inside of your foot, the outside, and the laces. Pass one touch, and two touch while receiving the ball with multiple surfaces as well. This helps you work on two fundamental skills at once.

When you’re receiving the ball and working on a proper first touch, make sure you stay on your toes and keep your head up. You also want to work on receiving the ball across your body and receiving the ball on the short hop

Dribbling is the easiest fundamental skill to practice by yourself. You can dribble around your yard, or even around your house or apartment. As with passing and receiving, make sure you are using all surfaces including the inside, outside, and laces. Work on dribbling through a set of cones or other objects, and work on performing a move while dribbling, like feints, cuts and step-overs.

For shooting, take a look at our article on How to Practice Shooting by Yourself at Home for plenty of ideas.

These are only a few ways to get started practicing your soccer fundamentals. What other ways do you know of honing these crucial skills?

image credit

Filed Under: Individual Soccer Training Tagged With: Defending, Dribbling, Heading, Passing, Receiving, Shooting

Should Soccer Players Practice Barefoot?

By Parker & Walsh Leave a Comment

barefoot soccer trainingSome of our soccer training articles have focused on the importance of getting the right shoes for the right situation (indoor or outdoor, youth or adult, etc.). This is all sound advice, but today’s article will take things in a very different direction: playing without wearing any shoes at all!

This may sound like something just for little kids or something you’d only do when kicking around casually on the beach, but there’s much more to the concept than you might be assuming. There are actually quite a few reasons why barefoot training can improve your game.

But with it naturally come some concerns relating to its safety. So overall, should soccer players practice their skills barefoot?

Benefits of Barefoot Soccer Training

There are quite a few specific benefits that soccer players get from shedding the shoes and practicing barefoot. These include helping you to develop a closer feel for the ball against your feet, which can improve your touch. A better touch in turn helps develop your dribbling skills, as well as achieving the proper weight in passing and better form for shooting.

In addition, it’s inherently a bit more difficult to practice things like juggling and shooting while barefoot, so by doing so you help hone those skills in a finer manner that can pay off for you big in the long run.

Everything from your balance to your stability and agility is gradually improved when you play barefoot, and your conditioning can even benefit due to the fact that without the cushion and support of your shoe, your foot is left to do more work and this subconsciously improves your running form.

Are There Risks of Practicing (and Playing) Soccer Barefoot?

Some players may be wary of practicing barefoot because they think it may lead to injuries. But on the contrary, training without shoes on can actually help prevent injuries and also help to strengthen the muscles in your foot.

Playing barefoot helps “activate” the many muscles in your foot and ankle which helps them to develop in accordance with their natural form and function rather than through the constraints that a shoe provides.

Studies have shown that barefoot running leads to a decrease in injuries to the knees as well as the hip and pelvis.

If you are playing an actual game or scrimmage against other players while barefoot, then you do want to have some caution so that you don’t get stepped on which indeed can hurt. (But this is still a danger even when wearing soccer shoes too, however.)

Should I Practice Barefoot?

Based on what we’ve explained so far, working in some barefoot training can have great benefits to your game so it’s definitely something that we recommend that you try. And it’s not just working on juggling and dribbling that you can try barefoot, but also bodyweight exercises, dynamic stretching, and conditioning and fitness work.

Now you don’t want to exclusively play without shoes to the level at which it will feel strange to lace up the boots when you play your next game. But when worked in to the rest of your individual soccer training plan, barefoot practice can be a major boost to your game. Do you train or play barefoot? If so how have it helped you?

image credit

Filed Under: Individual Soccer Training Tagged With: Barefoot

How to Get Better at Juggling at Home in your Backyard

By Parker & Walsh Leave a Comment

soccer juggling beachLittle to no time is spent on this soccer skill at soccer practice even though it will make you a better player. What skill am I talking about? Juggling, of course.

Working on your juggling skills at home will make you a better soccer player. And the other great thing is that the exercise requires very little space and the only thing you need a soccer ball. 

In our previous article Why Practicing Juggling Will Make You a Better Soccer Player, we explained that juggling improves one’s touch and their balance and agility. 

In another article on juggling tips and drills, we explained that you don’t have to lift the ball up with your foot. You can simply start with the ball in your hands. 

In those earlier posts we give you some juggling variations and challenges. Now to take that a touch further, in this article we are going to break down specific juggling drills for you to complete in order to better your touch.

Remember, the best soccer players work on their touch and skill outside of soccer practice, like juggling at home. So what type of player do you want to be?

Juggling Performance Levels:

Beginner:  1,000 – 3,000 touches per day

Proficient:  5,000 touches per day

Elite:  10,000 touches per day

Below are specific juggling drills for you to complete to get 2,000 touches. You’ll see that the variations include the height of each juggle, as well as varying up the spin which is a somewhat more advanced skill that you develop through regular practice.

Of course you can set higher touch goals for each section to get more touches. And you don’t have to get consecutive touches, just cumulative touches for each drill. So don’t fret if you lose control, you don’t need to start the count over.

Additionally, if you accidentally kick the ball above your knee when juggling below your knee, then it still counts as a touch. Furthermore, if you are working on No Spin Juggling and you accidentally put backspin on the ball, it still counts as a touch.

For one more tip, when you are working on No Spin Juggling, you should be able to read the words on the ball or see the images clearly on the ball.

As you juggle more, you will get more consecutive touches in a row and fewer drops. Hopefully, you will be able to get 100 to 200 touches in a row for each drill. Eventually, you may be able to complete a whole juggling section without any drops.

Home Juggling Drills (to get 2000 touches a day)

  • Juggling Below the Knee (400 total touches for this section)
    • Right (100 touches)
    • Left (100 touches)
    • Alternate (200 touches)
  • Juggling Between your Knees and Head (400 total touches for this section)
    • Right (100 touches)
    • Left (100 touches)
    • Alternate (200 touches)
  • Juggling Above Your Head (400 total touches for this section)
    • Right (100 touches)
    • Left (100 touches)
    • Alternate (200 touches)
  • Juggling with Backspin (400 total touches for this section)
    • Right (100 touches)
    • Left (100 touches)
    • Alternate (200 touches)
  • Jugging with No Spin (400 total touches for this section)
    • Right (100 touches)
    • Left (100 touches)
    • Alternate (200 touches)

This article is part of our 10,000 touch series, which helps you find easy ways to achieve the number of touches that may seem daunting but can really skyrocket your skill levels. Check out the Zig Zag Dribbling Soccer Drill article for ideas on how to get more touches.

image credit

Filed Under: Individual Soccer Training Tagged With: Juggling

The Best Soccer Dribbling Drill (for Beginners to Elite Players)

By Parker & Walsh Leave a Comment

soccer dribbling drills

How many touches on the ball should a soccer player get per day, or even per week? 

It really depends on how good YOU want to be because your team’s soccer practices aren’t making you a better player.

You do not get enough touches just by going to practice. You MUST practice outside your scheduled team practices if you want a shot at being an elite player.

The Dutch or Coerver methods for youth players have been tailored towards the individual perfecting their ball control skills by getting a lot of touches.

So in this article I have broken down how many touches a player should perform per day into three levels.

I don’t break it down by age because it doesn’t matter how old or young you are: you can always get better.

I would recommend starting out trying to get just 1,000 touches per day and then working your way up incrementally. 

How Many Touches to Get Each Day: Performance Levels

Beginner:  1,000 – 3,000 touches per day

Proficient:  5,000 touches per day

Elite:  10,000 touches per day

Dribbling is an important skill to master and helps improve your touch.

Whether you are just looking for soccer dribbling drills for beginners or a high school player looking to improve, dribbling a soccer ball around will greatly help with your touch.

This Zig Zag Dribbling Drill is my pick for the best way to practice dribbling, as it incorporates an unlimited variety of moves to keep things fresh and to help you work on different aspects of dribbling.

When working on your soccer moves and dribbling skills, you must always incorporate your change of direction and change of which are the most to crucial elements of a soccer move in order to beat defenders off the dribble.

The Zig Zag Dribbling Drill works on both.

How to Do the Zig Zag Dribbling Drill (Total Touches = 1,500)

To perform the Zig Zag Dribbling Drill, take two touches with the outside/pinky toe at a 45 degree angle and then perform a move (described below).

After the move, change direction and explode away from your defender with the outside/pinky toe of your other foot.

You should slow down on your second touch with the outside/pinky toe so you can get a change of pace.

This drill should have a rhythm of exploding with the outside/pinky toe touch, a slow outside/pinky toe touch, performing the soccer move and then repeating the rhythm.

I have divided the dribbling drill up by the number of touches you will take with one foot before you change to the other.

1. Four Touches (Total Touches for this section = 400)

  • Outside, Inside: 1. Start with pushing the ball with the outside/pinky toe, 2. a little cut with the inside of your foot, 3. another little touch with the outside/pinky toe, 4. cut the ball with the inside of your foot across your body. Repeat with your other foot. You will get 4 touches per foot  x 25 zig zags = 200 touches)
  • Stanley Matthews Move: Start by taking 2 preparatory touches with the outside/pinky toe pushing the ball, 3. slightly touch the ball with the inside of your foot while hopping in the same direction, 4. Explode away in the opposite using the outside/pinky toe of your foot. (Hint:  Touches 3 and 4 should be done very quickly; one right after the other.) To repeat on the other side you will need to use one of your preparatory touches to cut the ball with the outside of your foot. You will get 4 touches per foot x 25 zig zagst = 200 touches)

2. Three Touches (Total Touches for this section = 900)

For each of these moves, you will need to take 2 preparatory touches with the outside/pinky toe and then perform the move.

  • Inside Cut:  On the 3rd touch, cut the ball with the inside of your foot straight across or slightly backwards underneath your body. This is the key to the simple move. If you cut the ball forward, then the defender will poke it away or gain possession. You will get 3 touches per foot x 25 zig zags = 150 touches)
  • Outside Cut:  On the 3rd touch, you will have to reach across your body with your opposite foot to cut the ball with the outside of your foot slightly backward and about a ½ yard away from you. You will get 2 prep touches with one foot and then your outside cut with the other getting 3 x 25 zig zags = 150 touches)
  • Sole Stop:  On the 3rd touch, simply stop the ball with the sole of foot. Your momentum will carry you a little bit, which is good, putting the ball between your legs. Use the outside of your other foot to push the ball in the opposite direction exploding away from your defender. This will count as your first preparatory touch. You will get 3 touches per foot x 25 zig zags = 150 touches)
  • Ronaldo Chop:  On the 3rd touch, slightly jump and cut the ball with the inside of your heel to cut the ball behind your other foot. You will get 3 touches per foot x 25 zig zags = 150 touches)
  • Drag across your body:  Use the inside of your foot to drag the ball across your body to the other side. This is not a cut, so the ball should be stuck to your foot like glue until you get it across your body. You will get 3 touches per foot x 25 zig zags = 150 touches)
  • Brazilian Sole Roll:  Similar to the Sole Stop, however on your 3rd touch, you use the sole of your foot to flick the ball slightly backward and across your body. Remember similar to the inside cut, you don’t want the going forward because the defender will be able to poke it away or gain possession. You will get 3 touches per foot x 25 zig zag = 150 touches)

3. Two Touches (Total Touches for this section = 200)

For each of these moves, you will need to take 2 preparatory touches with the outside/pinky toe and then perform the move. However, with these moves you don’t actually touch the ball. This is why these moves are under Two Touches.

  • Feint:  After your 2nd touch, act like you are going to touch the ball with the outside of your foot/pinky toe like you are going to keep dribbling in the same direction but instead move your foot behind and around the ball and use the outside/pinky toe of your other foot to explode away. This touch will count as your first preparatory touch.  You will get 2 touches per foot x 25 zig zags = 100 touches)
  • Step-over:  After your 2nd touch, act like you are going to touch the ball with the outside of your foot/pinky toe like you are going to keep dribbling in the same direction but instead step over the ball or move your foot around and in front of the ball then explode away using the outside of your other foot. This touch will count as your first preparatory touch. You will get 2 touches per foot x 25 zig zags = 100 touches)

Now that you have learned the best way to get in a lot of touches, the Zig Zag Dribbling Drill, it is up to you to put the work in and to master the skill of dribbling!

image credit

Filed Under: Individual Soccer Training Tagged With: Dribbling

5 Ways to Improve Your Soccer Skills in Your Backyard

By Parker & Walsh 124 Comments

One major theme that we always try to show players is that in order to get better at soccer, you need to put in work outside of official team practices.
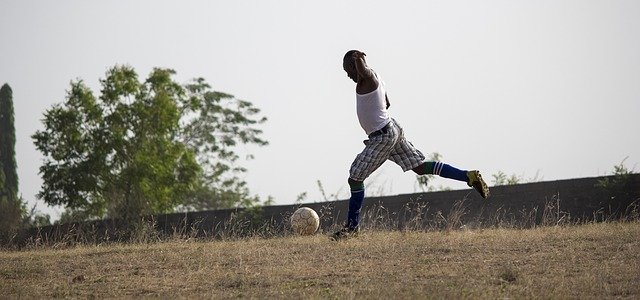
Individual training, encompassing technical skills and fitness work, is just as big a part of improving your game, if not even more so.

Here are 5 ways you can improve your soccer skills in your backyard, and you won’t need any fancy equipment.

Best Soccer Skills to Practice at Home to Improve Your Game

1.) Juggling Exercises

Juggling is an excellent exercise to work on in the backyard, but just because you can do cool tricks when you juggle does not mean that you are going to be a great soccer player. What juggling can do, however, is help perfect your touch.

You need to be able to feel just as comfortable as you are juggling in the backyard as in a league or championship game. To be clear, I’m not saying that you will actually be juggling the soccer ball in a game, but you will have to be able to control it. If you can juggle with ease in your backyard, then you will be able to control the ball much better in the game in a variety of situations.

When juggling, try manipulating the ball in different ways. For example, try juggling the ball without spin, with side-spin, with backspin, and topspin. If you learn how to control the ball when and how you want to, you will be able to manipulate it when you make passes in a game.

For example, there are times when you need to make a pass with backspin on it in order to keep the ball in play. You might need to be able to bend the ball around a defender’s leg in order to complete a pass.

Also, try to catch the ball on top of your foot and then start juggling again. Make sure that you are able to catch the ball on top of both feet, not just your dominant one. All of these juggling skills will help you in another very important area in soccer: trapping.

2.) Trapping (or Receiving) Exercises

After you are tired of juggling, you should work on trapping the ball out of the air. Here is one good way to do it: kick the soccer ball as high as you can under control.  If you have to make a quick little sprint, that is fine. (This will also help with your fitness.)

When the ball is coming down, use the laces (the top of your foot)  to settle the ball to the ground. As you are settling the ball, you do not want it to bounce high off your foot.

Also, the ball should not bounce away from you. You should be able to perform a move with your next step; this is really the key because you are keeping the ball close and will be able to play quick.

One final point: the term trapping, which used to be preferred, is often changed to receiving these days, which signifies a more fluid motion of bringing a ball under your control, as compared to trapping which brings to mind stopping the ball dead, which isn’t advantageous for making your next move.

3.) Dribbling

As simple as it seems, dribbling is a great skill to work on in your backyard. When dribbling, you need to be able to think a couple of plays ahead.

You need to be able to push the ball into a space where you can get the ball and the defender cannot.

When dribbling, work on keeping your eyes up and in front of you, rather than staring down at the ball.

Also, if you have a dog and he or she likes to chase a ball, then you can use your dog as a defender. Try moves to get past your dog.

4.) Passing

soccer kicking
Here’s an example of a passing drill you can perform in your backyard.

Start by taking a cone or another soccer ball and place it 10 yards away. This will be used to simulate your teammate in a soccer game, since a cone or a soccer ball is not any bigger than the width of a player’s foot.

Every inch counts in this exercise; if your pass is off by just a little bit, then you are not helping out your teammate. You could be putting him or her into a bad situation like a 50/50 challenge.

You can start by passing a moving soccer ball on the ground. The reason you should pass a moving ball is because this is how it will be in a game.  Make sure you are passing with both feet.

After you have hit your target at 10 yards, then move it back 5 yards. Keep moving the target back til about 40 yards.

Once you have mastered passing the ball on the ground, pass the ball in the air. I would start at 20 yards away. You want to be able to have the soccer ball hit your target in the air, as this will simulate a perfect pass.

When you are passing the ball in the air, you want to make it as easy as possible for your teammate to trap it. This is where he or she just has to lift a foot slightly off the ground in order to trap and play the ball quickly.

5.) Kicking a Soccer Ball Against a Wall

If you have a wall (perhaps from a garage or shed) in your backyard, you can use it for your soccer training.

Make sure it is a brick or concrete wall because you don’t want to put a hole into the surface. Also be sure there to pick a spot where there are no windows close by.

Once you have found a good wall to kick a soccer ball against, you can begin working on your skills.

Kick the ball against the wall with the instep of your foot (alternating feet) allowing the ball to bounce only once. Start out by standing about 2 feet away from the wall.

As you get better move back about a foot. Try to get in 100 one-bounce kicks off the wall.

Once you have mastered the instep, move onto striking the ball with your laces using both feet against the wall allowing only one bound before striking it back into the wall.

You will be able to perform this skill work on grass. One-bounces were created by Brian Jaworski, the Grinnell College Head Men’s Soccer Coach.

More Tips for Improving Your Game by Yourself

All of these skills can easily be worked on in your backyard without needing a teammate.

In order to get the most out of your training without anyone else there to keep you motivated, there are a few things you can do.

For one, it’s a good idea to clarify your goals of what exact skills are the most important to you to improve.

What is it that you’re working for? Making the team? Getting more playing time? Scoring more goals?

This helps you stay focused on the big picture and more motivated to continuously improve.

Along with this, it’s important to set a regular schedule for your training. Be sure it is realistic so you can stick with it.

These don’t need to be hour or two hour sessions by any stretch, even just 20-30 minutes regularly can have a major effect on your skill levels.

Finally, find ways to make the training exercises interesting and challenging for you. For juggling or wall kicks, try to get to a set number without messing up.

As you improve, adjust your challenges accordingly.

For more detailed training plans including these and many other types of drills, check out our individual soccer training system.

Do you have any other soccer training exercises you like to perform in your backyard? If so, let us know in the comments!

Photo Credit: clt3jxm

Filed Under: Individual Soccer Training Tagged With: Backyard

2 Soccer Fitness Tests for Your Training: 120s and Man U

By Parker & Walsh Leave a Comment

soccer fitness tests

Summer coming to an end is a surefire sign that it’s time to make sure you are properly fit to start your soccer season.

But no matter what the time of year, achieving a high level of fitness is crucial so working on conditioning is important year-round.

Becoming soccer fit takes hard work, sweat and mental toughness. But improving your soccer fitness is absolutely necessary if you want to become the best soccer player you can be.

Fitness is crucial in soccer because it helps you in so many ways. To give one example, fitness helps your touch because mentally you are not wasting brain-power thinking about being tired.

In order to assess your fitness levels, check out these two fitness tests: 120s and the Manchester United fitness test.

Depending on your level of play, you may find that your team requires you to pass one of these tests before starting the season. Or has you do it as an exercise to assess your fitness levels.

But even if your team doesn’t require it, these tests are a great way to put your soccer fitness to the test and see what level you’re at. As we often say on this website, it’s often how you train on your own outside of the structured team environment that puts you over the top for improving your game.

Both the 120s and the Man U fitness tests can have quite a few variations; we give our recommendations below.

120s Fitness Test: Details and How to Pass

For this test you will complete a series of 120 yard timed runs (a distance which gives the test its name).

First, run 120 yards in 20 seconds and then jog back to the start line in 30 seconds.

Then you get a 10 second rest at the start before starting again.

Typically, you complete the 120s fitness test by running this pattern 10 times in a row.

(If you really want to take your fitness to the next level, try to complete the 120s Fitness Test 15 times in a row. You’ll find that this is a real challenge no matter how fit you think you are!)

Acing the Manchester United Run (Man U Fitness Test)

old trafford

This fitness test, named for the legendary English club Manchester United, is a common one in both men’s and women’s college programs.

In order to pass it, you will need to run 20 100 yard sprints over a period of 20 minutes. Each run lasts one minute for a combined run and recovery.

The run and recovery periods will vary throughout the fitness test with run times as quick as 15 seconds to as long as 25 seconds.

Elite players will be able to complete the whole fitness test, but a great goal is 15 runs.

If you find yourself only able to run 10 to 15 runs, then keep working to see whether you can improve. Trying these tests every few days over a period of a few weeks is a great way to assess where you’re at and see how your training improves with time and effort.

How the Man U Fitness test works

For each of the first 10 runs, you have 25 seconds to run 100 yards.

The remaining time of the minute (35 seconds) is your recovery run time to make it back to the start line for the next run.

For the 11th to the 20th run, your run time decreases by one second. So on the 11th run, you have 24 seconds to run 100 yards, with 36 seconds as your recovery run back to the start line.

For the 12th run, you have 23 seconds for the run and 37 seconds for the recovery.

The pattern continues, with each run subtracting a second for your run and adding it to your recovery time.

This means that the final run, the 20th, gives you only 15 seconds to run 100 yards with 45 seconds, as your recovery run back to the start line.

As you can likely guess, this is a tough test of both speed and endurance and it’s difficult to reach this final stage! 

Other Fitness Tests: Beep Test and More

These two aren’t the only fitness tests out there. Another common one is known as the “beep test” which has players run between two cones that are about 20 yards apart.

The coach sounds the “beep” and the players must have run to the other cone before they hear it.

As the test goes on, the time in between beeps decreases so that by the end it is usually an all-out sprint to get to the other side.

This test provides some opportunity for strategy as you can try to pace yourself during the earlier stages when the time in between beeps is longer. Try to get to the cone just before the beep sounds.

Beyond the beep test, there plenty of others that all levels of teams, from high school to professional, use. Some keep it simple and do a 1 or 2 mile run in a certain amount of time like 6 or 12 minutes respectively.

More Tips for Passing Your Fitness Test

If your team requires you to pass one of these (or another) test, then the more time you have to prepare for it, the better.

If the test is in the fall, you don’t want to take an extended summer break and then try to pack in all of your fitness work in just one or two weeks before the season. Start small (especially if you have had a break or don’t consider yourself in great shape) and progressively increase the level of your runs.

You do want to regularly work on your fitness each week, but you don’t want to overdo it and try to do too much every day as this will not give your body enough recovery time. Gradually increasing the intensity each week is the best way to do it.

Also, as the day of the test nears, do lighter fitness work on the couple of days immediately preceding it and make sure that you are dedicating plenty of time for stretching. This will give yourself the best chance to perform at your highest level.

Have you tried either of the 120s or Manchester United fitness tests? Does your team require them? If so, how did you fare?

Is there another test that you (or your team) prefer?

photo credit Roman Boed

Filed Under: Fitness and Strength, Individual Soccer Training Tagged With: Fitness Test, Sprints

Soccer Juggling: Tips and Drills for Improving Your Game

By Parker & Walsh Leave a Comment

soccer juggling

image credit

When you’re looking for the best ways to practice your soccer skills by yourself, there’s one exercise you can do that’s very simple but also does wonders for your touch and control.

I’m talking, of course, about juggling.

Juggling can be difficult to master, but you don’t need to do anything super advanced in order to reap the benefits.

Benefits of Practicing Juggling

We’ve already written about how juggling can make you a better soccer player.

For one, it helps greatly with your touch improving your ability to control the ball when it comes at you at all speeds and from all angles.

An improved touch will also see you better able to make passes with the proper weight as well as keep the ball closer to you when dribbling.

Additionally, juggling helps you improve your balance and coordination since it forces you to make quick adjustments in order to keep the ball in the air.

A Great Backyard Exercise

Another of the biggest benefits of juggling is that you don’t need any special equipment aside from a ball; not even a wall or teammate that you typically need to practice passing or receiving.

This makes juggling a great exercise to do anywhere you have even a little patch of space: your backyard, a playground, even a local street or sidewalk.

Practicing juggling just a few minutes a day is enough to see real improvements when you are consistent with your training.

So how can you maximize your juggling practice as a beginner so that you can ensure it’s worth your while?

The Basics: Tips for How to Juggle a Soccer Ball for Beginners

The basic move of juggling needs no real introduction: just keep the ball in the air!

But if you’re just getting started and juggling a ball dozens of times seems intimidating, there are easy ways that you can start more slowly.

First, practice by holding the ball in your hands and dropping it. Let it bounce once, then kick it back up with your laces and catch the ball again.

Keep working at it until you have enough control with your kick that the ball easily comes up to chest height and you don’t have to reach out far to catch it.

Next you want to slowly increase the number of juggles: 2, 3, 4, and more as you are able to. (Depending on the surface and ball that you’re using, you can also drop the ball, let it bounce, kick it up, let it bounce, and then kick it again.)

Don’t forget to work with your non-dominant foot too! Practice alternating juggling with your left and right foot.

Some other general juggling tips include to keep your ankle locked so you avoid weak contact with the ball. You also always want to make sure you keep your eye on the ball when you’re just getting comfortable.

Finally, stay on your toes so that you can more quickly anticipate and react to the ball’s movements. This has an added benefit of building a great habit that you can carry forward to the team practice and game environments too.

Juggling with All Parts of the Body

To get the maximum benefit from your juggling you don’t want to stop with your feet; juggling is an exercise that can involve just about all body parts.

So work in some juggles with your thighs, your head, even your chest and shoulders when you feel confident enough to do so.

With your feet, you can also very up how you strike the ball. When you’re just learning you usually kick the ball so it has backspin; but when you’re more advanced you can work on juggles with no spin or even topspin, which is more difficult.

Best Soccer Juggling Drills and Challenges

player juggling soccer ball

image credit: wikimedia commons

The following are a few different drills and juggling challenges that you can try:

  • Juggle uninterrupted until you can get up to a chosen number (you might start with 50 or 100). After you achieve the challenge, increase the number and get it again.
  • Juggle with only your non-dominant foot for as many reps as possible.
  • Juggle in a pattern around your body, by going right foot, right thigh, head, left thigh, left foot, and repeat.
  • Juggle with no spin for as many reps as you can (then try doing the same with topspin).
  • Juggle while slowly jogging forward (then try jogging backward too).
  • Juggle with your feet while avoiding letting the ball get above your waist

If you have a partner or teammate with you, you can also work on a variety of juggling drills together, like juggling a set number of times and then volleying it to the other person who chest traps and then juggles the same amount before passing it back.

We hope this article gives you some good tips and pointers for good juggling technique as well as some ideas for what you can do to practice. If you have any other comments or questions or some other good juggling exercises that you like, let us know below.

Filed Under: Individual Soccer Training Tagged With: Ball-Control, Juggling, Touch

  • « Go to Previous Page
  • Page 1
  • Page 2
  • Page 3
  • Page 4
  • Go to Next Page »

Primary Sidebar

Get Better at Soccer – Faster!

Get Started Today - Button Orange

About Your Coach – Parker Koester

Parker Koester
I have extensive experience coaching soccer players of all types and can't wait to help you reach your highest level. Read more

Connect With Us

RSSTwitterFacebook

Latest Blog Posts

  • 5 Things You Can Learn from Watching Center Midfielders Play
  • How Youth Players Can Get Better By Watching Local High School and College Games
  • True Size and Height: How Big Are Pro Soccer Players, Anyway?
  • Best Practice Drills for Kids Ages 5 and Under
  • Why Every Soccer Player Should Know Tactics
  • Best Ways to Warm Up for Soccer Training or Pre-Game (Solo, Partner, and More)

Recent Comments

  • Scotty on What Would Happen if the Offside Rule Was Abolished?
  • Mike on What Would Happen if the Offside Rule Was Abolished?
  • Booze Baron on What Would Happen if the Offside Rule Was Abolished?
  • Hugh on What Would Happen if the Offside Rule Was Abolished?
  • Tarr on What Would Happen if the Offside Rule Was Abolished?
  • Tarr on What Would Happen if the Offside Rule Was Abolished?
Affiliate Disclosure and Privacy Policy

True Size and Height: How Big Are Pro Soccer Players, Anyway?

· Leave a Comment

Best Practice Drills for Kids Ages 5 and Under

· Leave a Comment

Why Every Soccer Player Should Know Tactics

· Leave a Comment

Best Ways to Warm Up for Soccer Training or Pre-Game (Solo, Partner, and More)

· Leave a Comment

How Much Do Managers Matter? From Tactical Genius to Man Manager

· Leave a Comment

guardiola

Club vs. National Team Tactics: Why They’re So Different

· Leave a Comment

The greatest accomplishment for any soccer player is to win the World Cup for their country. So it may come as a surprise to many to learn that this and other international tournaments aren't where … [Read More...] about Club vs. National Team Tactics: Why They’re So Different

nou-camp-la-liga

Premier League vs. La Liga: Tactics and Style of Play Compared

· Leave a Comment

It's no secret that watching the best professional players in the world can help you improve your own game. But is there a clear-cut best league to choose? The two top candidates that tend to … [Read More...] about Premier League vs. La Liga: Tactics and Style of Play Compared

epl champions

EPL Tactical Trends in 2022-23: What to Watch For

· Leave a Comment

One of the best ways to get better at soccer is to learn from the pros, and with the recent boom in soccer streaming services there are more ways than ever to watch the best leagues from around the … [Read More...] about EPL Tactical Trends in 2022-23: What to Watch For

soccer shin guards

Soccer Shin Guards: How Big Should They Be and What’s the Best Type?

· Leave a Comment

One of the benefits of soccer over certain other sports is that you don't need to wear lots of protective equipment like pads and helmets. There's one safety measure that is well worth it, however, … [Read More...] about Soccer Shin Guards: How Big Should They Be and What’s the Best Type?

soccer tactical analysis

The Problem With Soccer Tactical Analysis

· Leave a Comment

In recent years a particular type of soccer writing has boomed in popularity: the tactical analysis. These pieces aim to tell a story about how a game unfolded using subtle, easy to miss details that, … [Read More...] about The Problem With Soccer Tactical Analysis

  • The 4 Basic Soccer Skills Required To Play: A Beginner’s Guide
  • 7 Best Fitness Trackers For Soccer
  • Youth Soccer Positions Explained
  • Why All Soccer Players Prefer Grass Over Turf
  • What Are The Physical Benefits Of Playing Soccer? Find Out Here!

Copyright © 2025 · Log in